If you have a pool deck, then you know how important it is to keep it in good condition. Over time, cracks can develop in the concrete due to various factors such as freezing and thawing, settling of the ground, or heavy foot traffic. In this article, we will provide you with a step-by-step guide on DIY pool deck crack repair and recommend some products that can help you get the job done.
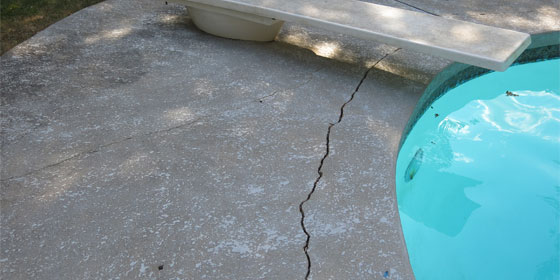
Step 1: Assess the Damage
Before you start repairing the cracks, it’s important to assess the extent of the damage. Small hairline cracks can usually be easily repaired with a simple crack filler, while larger cracks may require more extensive repair work. Take a close look at the cracks and determine their width and depth. This will help you choose the right products and techniques for the job. If you want to know more about pool deck crack repair then visit E-Z Patch.
Step 2: Clean the Surface
Once you have assessed the damage, the next step is to clean the surface of the pool deck. Use a pressure washer or a hose with a high-pressure nozzle to remove any dirt, debris, or loose material from the cracks. You can also use a wire brush to scrub the cracks and ensure that they are free from any loose particles. Cleaning the surface will help the crack filler adhere better and ensure a more durable repair.
Step 3: Fill the Cracks
Now it’s time to fill the cracks. For small hairline cracks, you can use a liquid crack filler. Simply pour the filler into the cracks, ensuring that it fills the entire crack. Use a putty knife or a trowel to smooth out the filler and remove any excess